The 2005–2013 Corvette looks like a straightforward evolution of the C5, yet the C6 range contains sharply different propositions. A base coupe with an automatic, a manual Grand Sport, a high-revving Z06, and a supercharged ZR1 vary in structure, engine, brakes, tires, cooling, lubrication, body width, running costs, and likely use. Even within one trim, model-year equipment changed. A useful purchase begins by identifying the exact car and its intended role instead of treating every C6 as a cheaper version of the fastest one.
To place C6 Corvette Buyer’s Guide: Trims, Trouble Spots, and Value in a wider ownership and engineering context, continue with How Corvette Magnetic Ride Control Works.
This independent guide does not certify a VIN, estimate market value, or promise reliability. It organizes evidence: title and option data, structure, body repairs, electronic records, powertrain health, chassis condition, modifications, and maintenance history. Use the appropriate General Motors information for the exact model year, and verify open recalls through an official VIN lookup. High-performance specifications should increase the depth of inspection, not the willingness to accept an undocumented story.
Choose the trim around use and operating cost
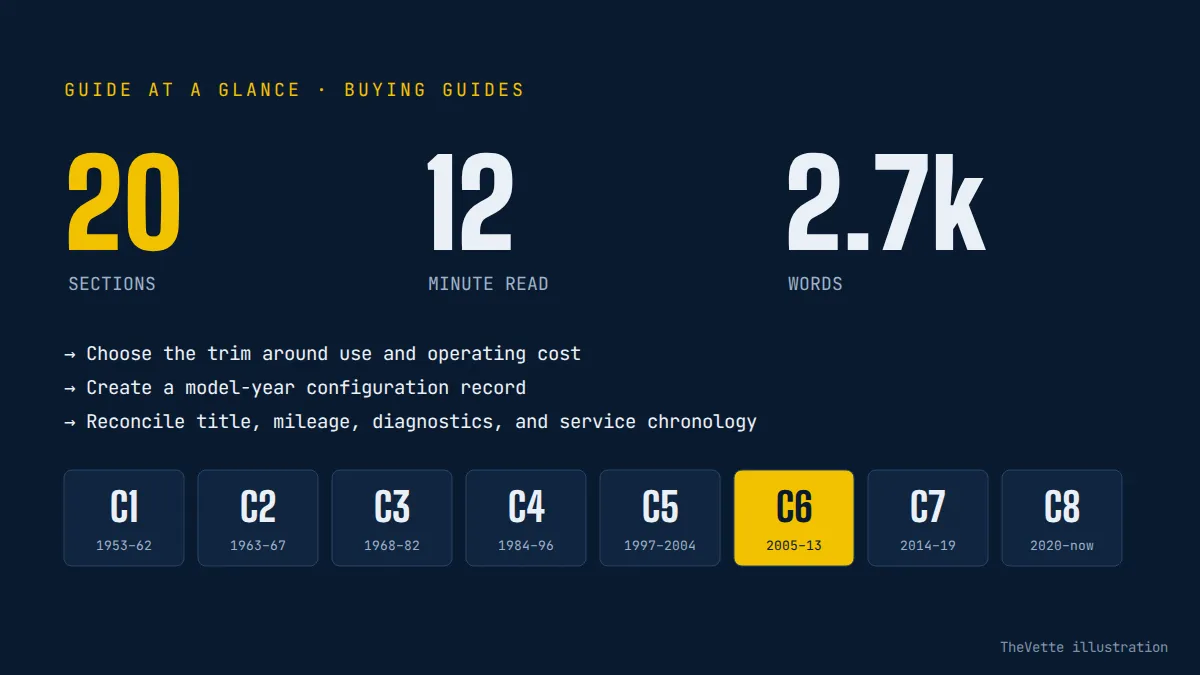
A standard coupe or convertible can deliver more performance than many owners use while retaining narrower tires and generally simpler replacement costs. The Grand Sport combines wider bodywork and performance-oriented chassis content with a different balance of road usability. The Z06 and ZR1 add specialized engines, materials, brakes, wheels, tires, and thermal demands. Decide whether the car will commute, tour, attend track events, remain original, or support a modification project before paying for capability that changes maintenance.
Build a first-year reserve that reflects the trim. Performance tires, large brakes, dampers, clutch work, cooling service, fluids, battery, weatherstrip, and electronic diagnosis vary widely in price. Add inspection, transport, insurance, tax, registration, and storage. A lower asking price does not compensate for old tires, deferred brake work, unknown calibration, or a high-output engine with no build documentation. Compare total readiness, not only purchase price and horsepower.

Create a model-year configuration record
Write down the correct engine, transmission choices, axle and suspension options, brake package, wheel and tire sizes, roof or convertible equipment, interior trim, and notable packages for the year. Photograph the VIN and service-parts identification information where applicable. Decode with a year-specific source, then compare physical equipment. Online advertisements often use Z51, Grand Sport, Z06, or ZR1 language loosely, especially after wheels and body panels have been changed.
Special editions require more than paint and decals. Confirm identity through VIN, option records, production documentation, and the combination of body, wheels, brakes, interior, engine, and trim. Reproduction appearance parts can be perfectly acceptable on a driver when disclosed. If designation or originality materially affects price, commission an independent specialist who understands factory production detail and common conversions.
Reconcile title, mileage, diagnostics, and service chronology
Compare the title with the VIN and review registration, emissions, inspection, and service records in date order. Mileage should form a continuous story. Seat bolster, steering wheel, pedals, switch surfaces, cargo area, and lower body wear provide context but cannot prove mileage by themselves. A history database may reveal events; it cannot establish absence of unreported damage or track use.
Ask for diagnostic scans and tuning records before anyone clears codes or disconnects the battery. Current, history, and communication faults can expose intermittent systems that behave during a short viewing. Long periods with very little use may create different needs from high annual mileage: fuel residue, aged tires, seals, batteries, corrosion on electrical contacts, and sticky hydraulic components. Let the timeline guide the inspection.
Inspect aluminum and steel structure appropriately
C6 structure differs by version, so establish the material and construction relevant to the trim. On a correct lift, inspect frame rails, cradles, suspension pickups, central tunnel and torque-tube areas, floors, jacking points, bumper reinforcements, and body attachments. Look for crushed lift points, tears, distortion, galvanic or ordinary corrosion evidence, non-factory welds, pulled fasteners, and coatings that hide repair. Aluminum structural repair requires suitable equipment and expertise.
Compare left and right wheel position, panel relationships, underbody fasteners, brake ducts, air deflectors, exhaust clearance, and alignment evidence. Carbon-fiber or composite floor and body elements on high-performance versions have different damage and repair considerations from conventional metal. A repaired car can be sound when dimensions, materials, procedures, and invoices are documented. A clean vehicle-history report is not a structural inspection.
Map composite, carbon-fiber, and flexible-panel repairs
View the body in diffuse daylight and with low-angle light. Compare gloss, orange peel, panel contour, edge masking, fastener disturbance, and overspray. Inspect bumper covers, hood, fenders, doors, quarters, rockers, roof, mirrors, lamp openings, and hatch surround. Wide-body panels and specialized hoods can be expensive to restore correctly. Fresh paint may improve appearance while obscuring cracking or poor fit at mounting points.
Operate hood, doors, hatch, fuel door, and roof latches slowly. Gaps should remain stable and closures should not require lifting. Examine hinge and latch hardware, seals, drain paths, hood vents, splitters, and undertray attachments. Low front aero pieces often show road contact; determine whether damage is cosmetic, has pulled adjacent mounts, or reflects an incorrect ride height. List every removable roof panel and storage accessory included in the sale.
Check cabin and cargo areas for water entry
Inspect windshield, door, roof, hatch, tail-lamp, and convertible-top sealing areas. Lift accessible cargo carpet and storage lids with permission. Look for dampness, mildew, staining, corroded fasteners, water tracks, and electrical connectors exposed to moisture. New weatherstrip does not prove the leak source was corrected; alignment, drains, adhesive, and body repair can affect sealing.
On a coupe, remove and refit the roof using the correct procedure, then inspect mounting points, latch engagement, panel condition, and storage hardware. On a convertible, cycle the top fully and examine fabric, glass, bows, latches, seals, deck interaction, and the storage well. Water intrusion can produce intermittent module and audio faults long after the carpet feels dry, so connect odor and electrical symptoms to the moisture inspection.
Use module data before replacing parts
Observe the warning-lamp self-check and driver information messages. Scan the powertrain, brake, body, restraint, suspension, and other accessible modules with compatible equipment. Save codes and status rather than clearing them. A generic engine-code reader is not a full-vehicle diagnostic. Readiness monitors that are incomplete can indicate a recent reset; ask why and allow adequate driving before relying on an emissions result.
Test battery capacity, alternator output, major grounds, terminals, fuse centers, and parasitic draw when symptoms justify it. Low voltage can create several unrelated messages. Inspect added audio equipment, radar wiring, lighting, fans, fuel controls, and performance electronics for secure routing and fuse protection. A hidden switch or battery disconnect should have a documented purpose. Repeated battery replacement without drain diagnosis is a pattern, not maintenance.
Identify the engine and lubrication system exactly
Confirm the installed engine and the configuration represented by the VIN and option data. C6 applications include several LS-family variants with different displacement, aspiration, internal components, lubrication arrangements, and service needs. Do not transfer a procedure from one trim to another. Oil-level checking, capacity, filter choice, warm-up, and track preparation must follow the correct owner and service information, particularly where a dry-sump system is fitted.
Arrange a cold start. Observe cranking, oil-pressure rise, exhaust after condensation clears, idle, warning messages, accessory noise, and leakage through warm-up. Inspect belts, tensioners, hoses, engine mounts, induction, vacuum lines, coils, injectors, fuel connections, grounds, exhaust manifolds, and heat shields. Compression, leak-down testing, oil analysis, or borescope inspection can be appropriate when engine condition materially affects the purchase, but results need expert interpretation.
Approach Z06 engine claims with evidence
A Z06’s engine and intended use justify a specialist familiar with that application. Review service history, oil-consumption notes, valvetrain work, engine noises, misfire data, compression or leak-down results, and any cylinder-head or camshaft invoices. Do not diagnose a car from forum reputation alone, and do not accept “all addressed” without identifying parts, machine work, measurements, installer, mileage, and calibration.
Track history is not automatically disqualifying. A car maintained before and after events, operated within temperature limits, and inspected regularly can be better understood than a low-mileage car with no records. Ask about over-revs, oil temperatures, fluid intervals, brake and tire use, and any data logs. A seller’s inability to prove absence of track use is not proof of abuse; rely on physical and electronic evidence.
Evaluate ZR1 supercharger and charge cooling
For a ZR1, inspect the complete induction and charge-cooling system, not only visible supercharger appearance. Ask about supercharger service, coupler or bearing work, coolant circuits, pump operation, heat exchanger, belt drive, calibration, and pulley changes. Modified boost requires matching fuel delivery, spark control, cooling, and tuning. A peak dyno number does not establish safe operation across temperature and fuel conditions.
Listen cold and hot, inspect for belt dust, pulley alignment, fluid leakage, improvised hoses, and wiring changes. Review logs or diagnostic data for knock, fuel trims, misfire, intake temperature, and pressure behavior when available. Testing at high load belongs in a controlled, safe context with owner permission. Price uncertainty when documentation is absent; do not assume an expensive component is healthy because the car idles smoothly.
Test cooling in the conditions the car will face
Inspect radiator and condenser faces, lower intake path, air seals, fans, shroud, cap, reservoirs, hoses, water-pump area, oil or charge coolers where fitted, and dried coolant. Low noses collect debris. Missing deflectors or a manual fan override can indicate an earlier problem. Aero changes that block intake area can affect thermal behavior even when they look purposeful.
Observe coolant and oil temperature during idle, ordinary driving, slower traffic, and heat soak, using verified data. Compare with the correct operating strategy rather than a generic number. Added radiators or fans do not cure every cause; airflow, sensors, fan commands, thermostat, pump, pressure control, calibration, or combustion leakage may contribute. Repeated warning messages, discharge, or reduced-power events require diagnosis.
Inspect torque tube, clutch, and rear transaxle together
The rear transmission is connected to the engine through a torque tube. Listen for noise and vibration at idle, with clutch position changes, during acceleration, at steady speed, and on coast. Inspect mounts, tunnel areas, couplers, transmission and differential cases, seals, cooler lines where applicable, and signs of removal. Major access labor makes an accurate diagnosis especially valuable.
On a manual, check clutch-fluid condition, pedal action, release, engagement, shifter centering, synchronizers, reverse, and behavior after warming. Determine whether clutch, flywheel, hydraulics, shifter, or gearing changed. On an automatic, evaluate engagement, shift timing, converter lockup, part-throttle behavior, temperature, leakage, and any calibration changes. Harshness is not proof of strength, and smoothness is not proof of internal health.
Separate differential, axle, and hub symptoms
Inspect differential mounts and case, output seals, half-shafts, constant-velocity joints, hubs, wheel studs, and nearby exhaust or suspension clearance. During the drive, compare sound under acceleration, steady load, coast, and gentle cornering. Tire noise, hub bearings, differential gears, torque-tube bearings, and exhaust resonance can overlap. Record the exact condition that reproduces a symptom.
Final-drive changes, high-grip tires, added engine torque, and competition launches increase system loads. Ask whether electronic calibration and speed reporting were updated. Review invoices for differential, clutch, axle, or hub work and check whether related fasteners, seals, and fluids were renewed. Avoid inferring abuse from one part; let wear patterns and records establish the likely use.
Inspect suspension and magnetic damping by mode
Examine control arms, composite springs, bushings, ball joints, tie rods, steering rack and mounts, anti-roll bars, dampers, wheel bearings, and cradle attachments. Look for torn boots, leakage, play, ride-height differences, impact marks, and mismatched components. Lowering hardware should retain travel and tire clearance. Alignment sheets should identify settings rather than merely state that an alignment occurred.
If Magnetic Selective Ride Control or another adjustable system is fitted, verify option identity, warning status, wiring and connector condition, damper leakage, and response to mode changes. Passive-shock conversions can be reasonable for a driver when disclosed and correctly configured. On the road, note steering center, tramlining, bump response, and stability under gentle braking and acceleration after recording tire age and pressure.
Brakes must suit the trim and wheel
Inspect master cylinder, booster, hard lines, flexible hoses, calipers, rotors, parking brake, ABS sensors and wiring, and fluid condition. High-performance fixed calipers and large rotors require attention to pad wear distribution, heat history, seals, hardware, and wheel clearance. Surface appearance alone cannot establish remaining rotor life. Ask for measurements and service dates.
Begin the drive with controlled low-speed stops. Pedal travel should remain consistent and the car should track straight without drag, pulsation, grinding, or warnings. Carbon-ceramic systems where fitted require specialist inspection and replacement-cost awareness; do not judge them with conventional rotor assumptions. Aftermarket packages need correct bias, master-cylinder relationship, hose routing, fasteners, and electronic compatibility.
Tire specification can change the car’s behavior
Record brand, model, size, load and speed description, date code, and pressure at every corner. Staggered fitments and trim-specific sizes make casual substitution risky. Inspect inner shoulders, sidewalls, repairs, cracking, flat spots, and contact. Mixing tire families can alter wet behavior and active-control response even when dimensions appear compatible. Old performance rubber can have deep tread and little grip.
Inspect wheels for bends, cracks, damaged lug seats, refinishing over defects, incorrect offsets, and representation as factory equipment. Wide wheels and low-profile tires are vulnerable to impact. Verify tire-pressure monitoring behavior and sensor age where applicable. Replace unsafe tires before high-speed evaluation; then align the car only after bearings, bushings, ride height, and wheel integrity are known.
Operate every cabin and access feature
Test keyless entry, locks, windows, mirrors, seats, belts, steering-column adjustment, climate control, air conditioning, blower speeds, wipers, washer, horn, exterior lamps, fog lamps, audio, navigation if fitted, power outlets, hatch release, fuel-door release, and roof latches. Confirm that warning lamps have not been hidden. Intermittent switches and modules can require more diagnosis than their small physical size suggests.
Inspect seat bolsters and frames, carpet, pedals, console, switch legends, cargo shade, storage bins, inflator or mobility equipment as configured, manuals, keys, and roof accessories. Strong fuel or exhaust odor requires investigation of tank, lines, hatch sealing, and exhaust. Compare wear with mileage documentation while recognizing that entry over a wide sill can wear one bolster quickly.
Road-test in controlled phases
Confirm insurance and start with steering and braking at low speed. Add ordinary acceleration, multiple gear changes, steady cruising, moderate bumps, and enough time for full temperature. Observe cold and hot starting, idle, throttle response, clutch or automatic operation, steering, brakes, instruments, messages, cooling, charging, vibration, wind noise, and fumes. Aggressive public-road driving is unnecessary and unsafe.
After shutdown, park over clean ground and inspect for fresh engine oil, coolant, transmission fluid, differential lubricant, fuel, and brake fluid. Observe fan behavior and hot restart, then rescan modules without erasing evidence. Sort findings into immediate safety, near-term reliability, diagnostic work, configuration questions, and cosmetics. Obtain estimates from shops experienced with the trim and drivetrain layout.
Make records explain expensive components
Strong files contain registrations, inspections, recall documents, option-label images, alignment sheets, module scans, tuning files, dyno data with context, engine or clutch invoices, fluid service, tire receipts, and photographs before body repair. Read them chronologically. A parts receipt proves purchase, not installation or calibration. Track consumables and post-event service can make demanding use more understandable.
An appraisal or clean history report does not replace current inspection. When the price depends on special-edition identity, low mileage, original paint, carbon-ceramic brakes, specialized engine work, or expensive modifications, seek independent expertise. List roof panels, wheels, take-off parts, keys, manuals, covers, chargers, and electronic devices in the agreement. Preserve tune and scan files in accessible formats.
Choose coherence over maximum specification
A defensible C6 purchase aligns title, VIN, options, physical equipment, service history, diagnostic data, structural condition, road behavior, and intended use. Safe tires and brakes, sound cooling and fuel systems, stable voltage, predictable steering, and documented calibration rank ahead of peak output or flawless paint. Estimate known work and retain contingency for issues that regular use reveals.
Walk away when identity evidence conflicts, structural access is refused, safety systems are bypassed, diagnostic information is repeatedly erased, or major engine and chassis changes have no records. The range is broad enough to wait. The right C6 is not necessarily the fastest version; it is the car whose capabilities, maintenance demands, and compromises the buyer can understand and support.