A first-generation Corvette is not one car repeated across ten model years. The 1953 roadster that introduced the name, the V8-equipped cars that followed, the four-headlamp models of 1958–1960, and the cleaner-tailed 1961–1962 cars differ enough that a sensible inspection begins with the exact year rather than a generic C1 checklist. Their shared fiberglass body and separate frame also demand a different way of reading condition: glossy paint cannot prove sound structure, and a tidy engine bay cannot establish identity. The objective is to connect documents, physical evidence, road behavior, and the intended use of the car.
To place C1 Corvette Buyer’s Guide: What to Inspect Before You Buy in a wider ownership and engineering context, continue with Every Corvette Generation Explained: C1 Through C8.
This guide is deliberately independent. It does not assign investment grades, authenticate a particular car, or replace a specialist’s hands-on examination. It explains how to organize a purchase so that a rare option or dramatic restoration does not distract from the frame, body mounting points, steering, brakes, cooling, and documentation. Production details and available equipment changed during the generation; use the appropriate General Motors vehicle information kit and recognized judging references for the exact model year before treating a component or finish as correct.
Decide what kind of C1 you actually want
Begin with use rather than color. A preservation-focused buyer may accept period driving manners in exchange for original components, finishes, and records. A touring buyer may prefer a carefully rebuilt car whose cooling, charging, braking, and weather sealing have already been sorted. Someone who wants informal shows may value presentation and model-year correctness without pursuing every factory marking. These are legitimate but different goals. Write down expected annual mileage, typical road speed, climate, passenger needs, storage conditions, and tolerance for ongoing work. That short brief becomes a defense against buying the most photogenic car instead of the most suitable one.
Budget for the first year as well as the purchase. Even an excellent older restoration can need aged tires, hoses, brake service, battery replacement, fluid changes, wheel alignment, or weatherstrip attention before regular use. Transport, tax, registration, insurance, secure storage, and a specialist inspection also belong in the acquisition cost. Keep a reserve rather than spending the entire budget on trim level or horsepower. Deferred safety work is harder to enjoy than a less glamorous specification that is ready to drive.
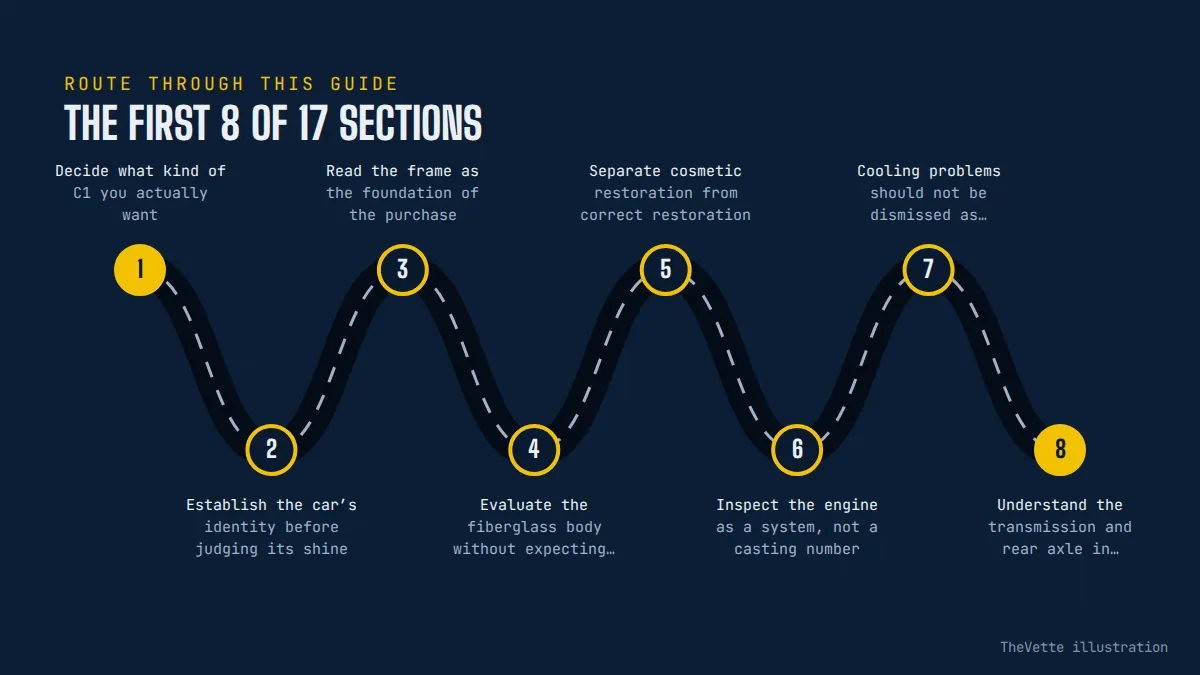
Establish the car’s identity before judging its shine
Ask for the serial or vehicle identification number, title details, engine-pad photographs where appropriate, trim information, and restoration records before traveling. Compare the identity information with the conventions for that model year; formats evolved during the 1953–1962 run, so a decoder for a later generation is not enough. Confirm that the number on the car is present, legible, and consistent with the paperwork. Irregular fasteners, disturbed mounting areas, unusual typography, or a story that changes when questions become specific deserve specialist review rather than an instant accusation.
A matching-number claim has to be defined. Sellers may use the phrase to mean the original engine remains, that major date codes align with the scheduled build period, or simply that the powertrain is the expected type. Ask which components are claimed as born with the car and what evidence supports each claim. A replacement block, transmission, generator, carburetor, or rear axle does not automatically make a C1 undesirable, especially for driving, but it can change historical interpretation and price. Record the claim in writing and have a qualified marque expert examine stamps, casting dates, assembly dates, and surrounding surfaces.
Read the frame as the foundation of the purchase
The fiberglass exterior does not eliminate corrosion risk; it can hide the steel structure beneath it. Inspect the frame from front crossmember to rear kick-up on a lift that supports the car correctly. Look at side rails, crossmembers, suspension pickup areas, body-mount regions, outriggers, bumper supports, and places where dirt or moisture can remain. Surface oxidation, scaling, perforation, collision distortion, and fresh coating applied over rough metal are different conditions. A uniform older finish can tell a clearer story than glossy black material that conceals seams and texture.
Check symmetry. Compare left and right rail shapes, weld appearance, bracket location, ride height, wheel position in the openings, and the relationship between the body and bumpers. Evidence of repair is not automatically disqualifying; many cars have lived long lives and competent structural repair can be safer than untouched damage. The key questions are why work was needed, how far it extended, how alignment was verified, and whether photographs or invoices document the process. If the frame number or other identifying marks are relevant to the year and claim, let a specialist locate and interpret them without aggressive cleaning.
Evaluate the fiberglass body without expecting modern perfection
Early fiberglass construction has its own visual language. Study the body in diffuse daylight, then use angled light to reveal waviness, sanding marks, sink areas, cracks, and differences in gloss. Pay attention around hood and deck openings, headlamp areas, wheel arches, door corners, hinge zones, emblem holes, and body mounts. Small stress lines may reflect age or local movement; broad cracking, obvious mat texture, mismatched contours, or repeated fractures can indicate a poor repair or unresolved structural stress. A paint-depth meter designed for steel is not the primary diagnostic tool here.
Panel gaps on a handmade mid-century fiberglass sports car should not be judged by contemporary production-car standards, but they should make sense as a system. Doors should latch without lifting, hood and deck edges should sit reasonably relative to adjacent surfaces, and gaps should not abruptly tighten where the body appears twisted. Examine the underside where possible. Repair technique, resin color, cloth pattern, overspray, and new material beside aged laminate may help a knowledgeable inspector map prior work. The issue is not whether the body has ever been repaired; it is whether the work is stable, correctly shaped, and honestly represented.
Separate cosmetic restoration from correct restoration
A bright engine compartment, new upholstery, and polished stainless can create confidence before the mechanical evidence has been considered. Ask who performed the restoration, when it was completed, what standard guided it, and which original parts were retained. A photograph album that shows disassembly, frame condition, body repairs, component tags, paint preparation, and reassembly is more informative than a folder of final-detail receipts. Invoices should identify suppliers and operations rather than simply saying “complete restoration.” Compare dates and mileage so the story forms a continuous timeline.
Correctness is model-year specific and deeper than color. Hardware finishes, hose routing, clamps, ignition shielding, air cleaners, generators, valve covers, gauges, upholstery patterns, wheel covers, emblems, and fasteners can change. Do not use a neighboring year at a show as the sole reference. Consult the correct GM information kit and established judging manuals. Decide how much correctness matters before paying a premium for it. A discreet modern component may be sensible on a frequently driven car, but it should be disclosed, competently installed, and reversible when preservation is part of the value.
Inspect the engine as a system, not a casting number
Verify the engine type promised by the seller, then evaluate health. A cold start is valuable because pre-warming can hide hard starting, smoke, noise, or choke problems. Arrange in advance that the car remain cold and confirm by touching safe external components before startup. Watch oil-pressure behavior on the gauge, listen through the warm-up cycle, and observe exhaust after the initial condensation clears. Note leaks before and after the drive. Compression or leak-down testing may be appropriate when results would influence the purchase, but interpretation belongs with someone familiar with vintage small-block and six-cylinder engines.
Fuel delivery deserves special attention. Early Corvettes used different carburetion arrangements across the generation, including multiple-carburetor and fuel-injected applications in some years. Complexity, rarity, and correctness can magnify both value and repair cost. Check throttle movement, linkage, fuel lines, filters, heat-related behavior, idle quality, and restart when hot. Any raw-fuel smell should be investigated before driving. Ethanol-compatible soft parts and careful storage practices may improve real-world ownership, but a seller should not describe a modified system as untouched original. For a claimed fuel-injected car, authentication and setup require specific expertise.
Cooling problems should not be dismissed as “old-car behavior”
Inspect the radiator, tanks, cap, hoses, clamps, water pump area, fan, shroud where applicable, thermostat housing, and signs of coolant tracking. Confirm fluid level only when the engine is safely cold. Look for staining around overflow paths and for improvised electric fans or switches whose wiring and purpose are undocumented. During the drive, watch temperature in traffic, at steady speed, and after a hot restart. Gauge accuracy should be checked if the reading is suspicious; a calm needle does not prove actual temperature.
A C1 used in modern traffic needs a cooling system in sound condition, but the solution is not automatically the largest aftermarket radiator. Ignition timing, mixture, restricted passages, slipping belts, missing airflow pieces, incorrect caps, and inaccurate instruments can contribute to symptoms. Ask what diagnosis preceded any modification. A coherent, documented repair is more reassuring than a sequence of added components. After shutdown, inspect for boiling, discharge, and fresh leaks, while keeping clear of pressurized coolant. Persistent overheating is a reason to investigate, not a personality trait to accept.
Understand the transmission and rear axle in context
The first Corvettes were not all manual-transmission cars, and later years offered configurations with very different character. Confirm what the car was built with, what is installed now, and whether conversion work affected the frame, pedals, linkage, tunnel, wiring, speedometer drive, or final-drive choice. On a manual car, check clutch take-up, pedal free play, shift quality during gentle acceleration and deceleration, and noise in each gear. On an automatic, evaluate engagement, shift behavior, leakage, and adjustment without applying modern transmission expectations.
Listen for rear-axle whine on drive and coast, clunks during load changes, and vibration that varies with road speed. Inspect universal joints, driveshaft condition, mounts, seals, and evidence of contact or altered angles. Gear ratio affects how relaxed the car feels on faster roads, so establish it rather than assuming. A ratio chosen for acceleration may be tiring during the touring use you envision. If a component has been changed, determine whether the speedometer and tachometer readings remain credible and whether the modification was documented.
Steering and suspension reveal how the car has been maintained
With the front wheels safely unloaded, an experienced inspector can separate steering-wheel free play into contributions from the steering gear, linkage, joints, and wheel bearings. Examine the idler and pitman areas, tie-rod ends, kingpin or ball-joint arrangements as appropriate to the year, control-arm bushings, springs, shocks, and mounting points. Grease fittings should show evidence of maintenance rather than layers of hardened dirt. Uneven tire wear can reflect alignment, worn parts, bent components, or merely old tires, so follow the clue instead of treating it as a diagnosis.
On the road, the car should track consistently on a reasonably flat surface, return predictably after a turn, and respond without binding or sudden direction changes. Vintage steering effort and response differ from a modern sports car, particularly at parking speed, but “they all wander” is not a satisfactory explanation for looseness. Note steering-wheel position, pull under braking, vibration, and noises over small bumps. The goal is not to demand contemporary isolation; it is to identify behavior caused by wear, poor alignment, incorrect tire pressure, or mismatched components.
Brakes are an acceptance gate, not a future cosmetic project
Brake design changed after the C1 era, so judge the installed system using the correct specifications and safe vintage-car practice. Inspect hard lines, flexible hoses, wheel cylinders or calipers if modified, master cylinder, drums, backing plates, parking-brake hardware, fluid condition, and evidence of leakage at each wheel. Old rubber hoses can look acceptable externally while deteriorating within. Ask when the hydraulic system was last comprehensively serviced and whether invoices identify the parts and fluid used.
Test braking gently in a safe area before increasing speed. The pedal should behave consistently and the car should stop straight without grabbing, grinding, or a sinking pedal. Do not continue a road test when safety is uncertain. Power-assist conversions, dual-circuit systems, or disc-brake changes may improve the owner’s confidence, but engineering quality matters: routing, bracket strength, pedal geometry, wheel clearance, proportioning, and documentation should be reviewed. A modification is not automatically an upgrade merely because it is newer.
Tires can make a restored car unsafe to test
Read every tire’s date code, size, load and speed description, and inspect both sidewalls. Low mileage does not stop rubber from aging. Cracks, flat spotting, separation, hardened tread, mismatched construction, or contact with body and suspension are reasons to pause. Confirm that wheels are the correct dimensions for the tire and clear steering and braking components throughout travel. A vintage-looking tire may suit presentation, while a modern construction may suit touring; choose intentionally and ensure the combination is approved by reputable tire and wheel professionals.
Wheel condition also matters. Look for elongated stud holes, damaged seats, cracks, bends, missing or incorrect fasteners, and decorative covers that interfere with inspection. Verify torque using the correct procedure after service rather than accepting an impact wrench as proof. Tire pressure should follow credible guidance for the actual tire and vehicle configuration, not an arbitrary maximum printed on the sidewall. A car that has been displayed for years may need tires before any meaningful handling assessment can occur.
Check instruments, wiring, lights, and charging methodically
Operate every switch and accessory: headlamps and their mechanisms where applicable, parking and brake lamps, turn signals, horn, wipers, heater blower, gauges, courtesy lighting, and radio if included in the claim. Watch for dimming, heat, odor, intermittent operation, or improvised switches. Inspect visible harness sections for brittle insulation, household connectors, unsupported splices, and unfused add-ons. A hidden battery cutoff or modern fuse panel can be useful, but its installation should be documented and accessible without damaging original material.
Confirm charging voltage and starting behavior both cold and hot. A converted alternator, electronic ignition, electric fuel pump, or auxiliary fan changes the electrical load and troubleshooting path. Ask for a wiring diagram reflecting those changes. Battery location, hold-down, cable routing, terminal protection, and ventilation should be safe. Gauge readings are part of the mechanical evidence only when the senders, grounds, and instruments are functioning accurately; compare suspicious values with an independent measurement rather than assuming either the gauge or the seller is correct.

Interior condition can expose the quality of hidden work
Sit in the car long enough to assess seating position, pedal relationship, steering-wheel clearance, visibility, and heat tolerance. Inspect seat frames and attachment points, belts if fitted, door latches, window operation, top frame, weather seals, carpets, and the floors beneath removable sections when the owner permits. Water staining, mildew odor, corroded fasteners, swollen trim, or damp insulation suggests a leak that should be traced. A new carpet kit can conceal rather than cure moisture problems.
Soft-top fit is best checked erected, latched, and viewed from several angles. Examine fabric, stitching, rear window, header seal, frame joints, and storage method. If a removable hardtop is included, confirm identity, fit, latches, weatherstrip, headliner condition, and a safe stand or storage plan. Tops and trim can be expensive to correct, but more importantly they show whether restoration details were finished as a coordinated system. Verify that keys operate the relevant locks and that spare-wheel, jack, and tool claims match what is physically present.
Use the test drive to verify, not to celebrate
Agree on route and insurance before moving the car. Begin with low-speed steering and braking, then include ordinary acceleration, steady cruising, gentle deceleration, a few smooth turns, and enough time for full operating temperature. Avoid abusive tests; they are unnecessary and disrespectful to a vintage machine. Note starting, idle, throttle response, clutch or transmission behavior, steering consistency, brake feel, temperature, oil pressure, charging, vibration, rattles, fumes, and cabin heat. Ask the seller to drive first if that helps reveal established operating habits.
Afterward, let the car idle briefly if safe, shut it down, and inspect the ground and underbody again. Fresh fluid can identify leaks that were not visible when cold. Check hot restart behavior and listen during heat soak. Compare observations with the seller’s description without turning the process into a confrontation. A candid explanation supported by invoices is useful; dismissal of every concern as normal is not. Put findings into three columns: immediate safety work, near-term reliability work, and optional cosmetic or correctness work.
Documentation should make the car easier to understand
Useful records include title history, old registrations, dated photographs, owner correspondence, judging sheets, restoration invoices, parts receipts, machine-shop reports, alignment data, and service logs. Names and dates should connect. A large binder is not automatically strong evidence if its contents belong to another car or lack identifying details. Scan the timeline for long storage, mileage inconsistencies, abrupt identity changes, and major work without supporting invoices. Protect previous owners’ personal information when copying records.
Awards and judging results can support a description of condition at a particular time under a particular organization’s rules; they are not permanent mechanical warranties. Ask when the judging occurred and how the car has been stored and driven since. Likewise, an appraisal states an opinion for a purpose and date. The purchase decision still needs current inspection. If provenance materially affects price, use an expert who can assess documents and the physical car together.
Translate the inspection into a defensible offer
Separate market preference from repair cost. Color, engine, transmission, model year, documented originality, and historical significance can affect desirability, while worn brakes, old tires, overheating, corrosion, and poor body repairs create work. Estimate the latter with specialists who understand C1 parts and labor. Do not subtract a generic restoration number from an asking price; the scope and quality needed for a driver differ from those for judged presentation. Include transport and commissioning costs in the calculation.
Write the offer around what has been verified and make any inspection, title, or document conditions explicit. Confirm which loose parts, tops, manuals, records, and spares transfer with the car. Use a bill of sale that accurately describes identity and agreed representations, and follow local legal requirements. If the seller refuses a reasonable independent inspection on a car priced for authenticity and condition, the unanswered question itself is information. There will be another Corvette; urgency should come from preparation, not pressure.
A practical C1 decision sequence
First, confirm that the year and configuration fit your intended use. Second, establish legal and physical identity. Third, inspect frame and body structure before valuing paint. Fourth, evaluate brakes, tires, steering, fuel, cooling, and electrical safety. Fifth, assess powertrain health and road behavior. Sixth, examine restoration quality and model-year correctness to the degree relevant to your goals. Seventh, reconcile every major claim with records. Finally, obtain written estimates and decide whether the complete package—not a single rare feature—fits the budget.
A strong C1 purchase is understandable. It may be highly original, comprehensively restored, sympathetically updated, or honestly imperfect, but its condition and history should support the seller’s description and the buyer’s intended use. When evidence conflicts, slow down. A specialist inspection costs little compared with structural repair, authentication disputes, or a car that cannot safely deliver the experience you expected. The reward for disciplined buying is not merely avoiding a bad example; it is choosing a first-generation Corvette whose compromises you knowingly accept and whose strengths you can actually enjoy.