The third-generation Corvette spans 1968 through 1982, a fifteen-model-year run that crossed major changes in styling, bumpers, powertrains, emissions equipment, interiors, transmissions, and manufacturing detail. Calling a car simply “a C3” hides much of what determines its character and inspection priorities. A chrome-bumper 1969 roadster, a mid-1970s emissions-era coupe, and a 1982 Collector Edition share recognizable proportions but should not be researched, valued, or test-driven as though they were interchangeable.
To place C3 Corvette Buyer’s Guide: Chrome, Rubber Bumpers, and Reality in a wider ownership and engineering context, continue with How Originality, Documentation, and Condition Affect Corvette Value.
A disciplined purchase begins with the exact model year, the configuration represented by the seller, and the way the buyer expects to use the car. This guide does not authenticate an individual Corvette or prescribe a price. It explains how to compare the physical car with model-year records, assess the steel structure concealed by fiberglass, identify unsafe or incoherent modifications, and turn an inspection into a realistic ownership plan. Use the appropriate General Motors vehicle information kit and qualified model specialists for claims that materially affect value.
Start by placing the car in the correct C3 era
Create a one-page reference for the target year before looking at listings. Record bumper material and shape, grille and fender treatment, rear panel, roof arrangement, interior design, available engines and transmissions, wheel equipment, and notable options. The details changed repeatedly. The 1968 debut has features not carried forward unchanged; federal bumper requirements reshaped the ends of later cars; rear glass and hatch arrangements evolved; and the final years brought combinations of appearance and equipment unique to their period.
This reference sheet prevents two common errors: paying early-car money for a later body assembled to resemble one, and dismissing a legitimate year-specific feature because it differs from an internet photograph. Modifications are not automatically bad. A later transmission, ignition system, cooling upgrade, or brake component can make a driver more useful. The seller’s description should distinguish factory configuration, service replacement, and deliberate alteration, while the price should reflect what the car actually is.
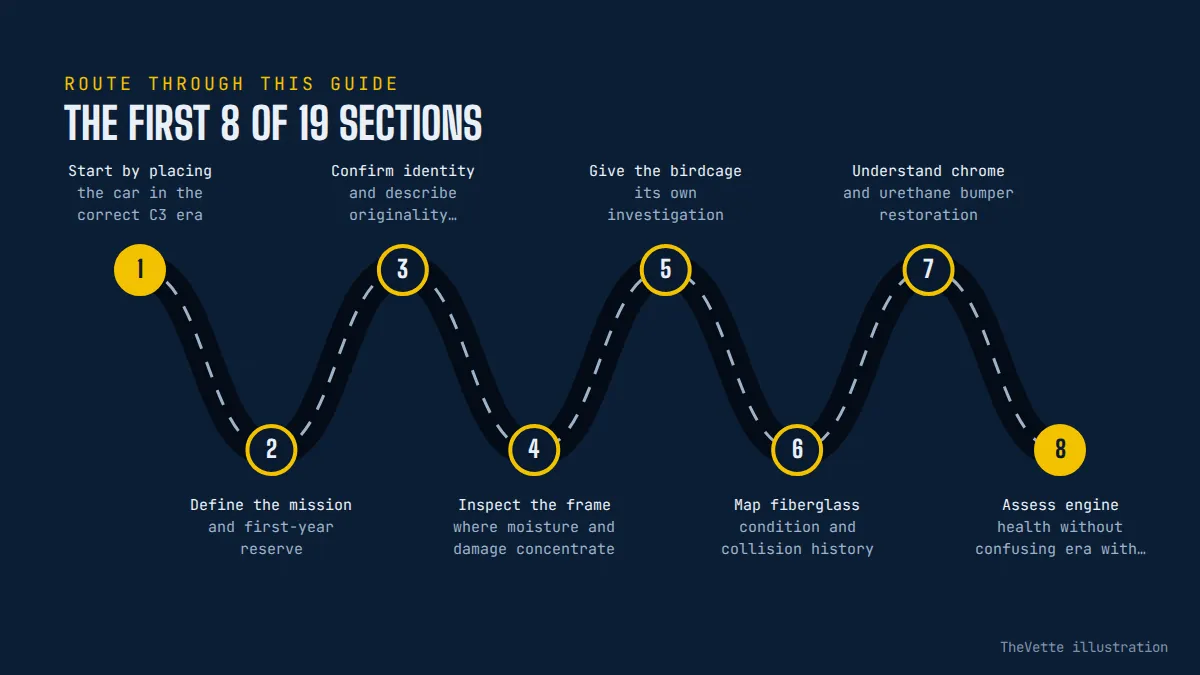
Define the mission and first-year reserve
C3 buyers often choose between visual eras before considering use. Decide whether the car will handle local weekend drives, long touring days, preservation events, informal shows, or a mechanical project. Cabin heat, steering effort, gearing, air-conditioning performance, luggage access, weather sealing, and seat comfort matter differently in each role. A rare engine or attractive color cannot solve a mismatch between the car’s setup and the owner’s roads.
Keep money outside the purchase price for commissioning. Tires can age out while retaining deep tread. Brake fluid, hoses, belts, cooling components, fuel lines, battery, wheel bearings, suspension joints, and differential service may need attention after storage or intermittent use. Add insurance, registration, transport, secure storage, and specialist inspection. A less prestigious example with documented mechanical renewal can be a more satisfying choice than a cosmetically restored car that consumes the reserve immediately.
Confirm identity and describe originality precisely
Compare the title with the car’s identification number and the model-year format. Inspect the plate or stamping location, characters, attachment method, and surrounding material using accepted references. Body, engine, transmission, axle, trim, and option evidence should form a plausible timeline. Date codes normally precede final assembly by reasonable intervals; they are not expected to match one calendar day. Disturbance, incompatible sequences, or newly applied finishes around an identification area should prompt expert analysis rather than improvised cleaning.
Ask the seller to define “numbers matching.” It might refer only to an engine block, or it may be intended to cover the installed powertrain and key dated components. List every part included in the claim and the evidence for it. A replacement engine can be entirely appropriate in a frequently driven C3, but it changes the meaning and sometimes the price. Reproduction labels and restamped components require careful interpretation. Paperwork, old photographs, casting information, assembly stamps, and the overall condition story must agree.
Inspect the frame where moisture and damage concentrate
Fiberglass body panels do not protect the separate steel frame from corrosion. Place the car on a suitable lift and inspect rails, crossmembers, suspension pickup points, transmission support, body mounts, rear kick-up, bumper supports, and areas affected by leaking fluids or trapped road debris. Use adequate light and compare both sides. Scaling, perforation, swelling seams, collision kinks, torn brackets, and crushed lifting areas represent different repair scopes. Fresh black coating should increase curiosity when it obscures texture or welds.
Check wheel location within each opening, frame symmetry, ground clearances, and the relationship among body, bumpers, and chassis. Previous repair can be sound when damaged metal was properly removed, dimensions restored, welds executed correctly, and corrosion protection applied. Ask for photographs taken before coating and for alignment or frame measurements. A patch laid over rust or a rail filled with expanding material is not equivalent. Structural uncertainty justifies a body-and-frame specialist before negotiation.
Give the birdcage its own investigation
The C3 body includes a steel inner structure commonly called the birdcage, surrounding key cabin and windshield areas beneath fiberglass and trim. Water entering around glass, weatherstrip, roof panels, doors, or drains can attack this structure without creating obvious exterior rust. Inspect accessible windshield-frame edges, pillars, door-hinge and latch regions, roof openings, kick panels, floor-adjacent areas, and body mounts. Corroded fasteners, swelling beneath trim, staining, brittle sealant, and doors that no longer align can be clues.
A complete birdcage assessment may require trim removal that is inappropriate during an ordinary viewing, which is why history and indirect evidence matter. Ask whether glass has been removed, whether corrosion repair was performed, and whether photographs show clean metal before reassembly. Replacement weatherstrip does not prove the structure beneath it was sound. Significant birdcage repair can demand extensive disassembly and body alignment; price uncertainty accordingly instead of assuming fiberglass means rust-free.
Map fiberglass condition and collision history
Study the body under soft daylight and low-angle artificial light. Look for ripples, sanding grooves, print-through, cracks, mismatched contours, overspray, and differences in gloss. Concentrate around nose and tail sections, wheel arches, hood corners, door openings, roof-panel recesses, bonding seams, lamp openings, and body mounts. Flexible bumper covers on later cars add aging, distortion, cracking, and material-compatibility questions that differ from chrome-bumper repair.
Operate doors, hood, roof panels, headlamp doors, wiper door where fitted, fuel door, and rear storage or hatch mechanisms. Gaps need not meet modern-car uniformity, but they should be stable and function without lifting or force. A door that drops, a hood that contacts one corner, or wheels that sit differently from side to side can connect body symptoms to hinge wear, mount deterioration, or structural alignment. Restoration photographs are most persuasive when recognizable car details and dates create continuity.
Understand chrome and urethane bumper restoration
Chrome-bumper cars require inspection of brackets, mounting points, plating quality, alignment, and the body surfaces hidden behind brightwork. Reproduction pieces may fit differently from original components. Look for collision repairs where brackets meet the frame and for fiberglass reshaping used to disguise poor bumper position. Minor plating flaws are cosmetic; distorted mounts or fractured surrounding laminate point to deeper work.
Later energy-absorbing bumper systems use covers and underlying supports whose age can alter shape and fit. Examine waves, shrinkage, cracks, paint adhesion, seam alignment, fasteners, absorbers, and brackets. A freshly painted cover can still have incorrect material preparation or distorted support beneath it. Ask whether the cover was original, repaired, or replaced and whether compatible flexible products were used. Do not assume a visually smoother aftermarket piece is historically correct or safer.
Assess engine health without confusing era with condition
C3 engine choices and published ratings changed substantially. Early gross horsepower figures and later net ratings are not directly comparable, and emissions-era output cannot be understood from one number alone. Establish the factory engine available for the year, identify what is currently installed, and evaluate present mechanical health. A lower-output original configuration may be preferable to a poorly integrated high-power replacement. Conversely, a documented, professionally built engine can suit a driver when represented honestly.
Arrange a cold start. Observe choke or enrichment behavior, cranking speed, oil-pressure rise, exhaust after condensation clears, valve-train or bearing noise, idle quality, and leaks through warm-up. Inspect engine mounts, fuel hoses, carburetor or injection components, intake, distributor, exhaust routing, wiring, breathers, and cooling connections. Compression, leak-down testing, or oil analysis may be useful when interpreted by a qualified shop. Do not let fresh paint on the block substitute for evidence of internal work.
Audit emissions equipment and modifications
Emission-control systems varied with year, engine, transmission, and market. Determine which components should be present, what has been removed or altered, and what local law requires. Air-injection equipment, exhaust-gas recirculation, catalytic converters, evaporative controls, carburetor calibration, ignition timing, and thermostatic air systems can affect legality, drivability, heat, and originality. Missing equipment may create registration or inspection problems even when the engine appears to run well.
Ask for documentation of engine changes and tuning. An aftermarket camshaft, intake, carburetor, headers, or distributor should work as a combination with compression, gearing, cooling, vacuum needs, and exhaust. A large carburetor and aggressive idle are not proof of a well-engineered package. Check cold manners, part-throttle operation, hot restart, fuel odor, detonation, and vacuum-dependent accessories. Unsupported performance claims should not enter the price calculation.
Inspect vacuum-operated systems patiently
Many C3s use engine vacuum for headlamp doors and, in some years, the windshield-wiper door. Test operation through several cycles with the engine running, then observe whether doors remain in the expected position after shutdown. Slow, uneven, or incomplete movement can involve hoses, relays, switches, actuators, check valves, reservoirs, adjustment, or binding hinges. Replacing one visible hose may not correct a distributed leak.
Trace accessible lines for hardening, cracks, incorrect routing, heat exposure, and improvised plugs. Inspect actuator rods, pivots, stops, and paint clearance before repeated operation. A manual conversion should be disclosed and evaluated for safe, convenient use. Vacuum problems are rarely a reason to reject an otherwise strong car, but diagnosis and restoration can consume time. Their condition is also a useful indicator of whether small functional details were completed during restoration.
Cooling and fuel systems must tolerate the intended use
Inspect radiator type and core, tanks, cap, hoses, clamps, water pump, belts, fan and clutch where applicable, shroud, overflow arrangement, and air-sealing pieces. Look for dried coolant, bent fins, solder repairs, pulley misalignment, and auxiliary fans connected without relays or fuses. Observe temperature during idle, normal cruising, slower traffic, and heat soak. Validate a suspicious gauge with independent measurement rather than accepting either alarm or reassurance at face value.
Follow the fuel path from tank area to carburetor or injection system. Check rubber sections, hard-line support, filters, pump, return system where fitted, tank venting, filler seal, and any electric-pump safety strategy. Fuel odor in the cabin or rear storage areas needs explanation. Modern fuel can expose aged soft components, while long storage can leave residue in tanks and carburetors. Ask whether the system was cleaned or merely supplied from a temporary source to start the car.
Match transmission and axle behavior to documentation
Confirm the installed transmission, identification, shifter, linkage, and claimed originality. Manual cars should engage cleanly, release fully, and shift without persistent clash or jumping out of gear. Automatic cars should select ranges promptly and shift consistently at appropriate throttle. Inspect cooler lines, fluid condition, mounts, crossmember, driveshaft, universal joints, seals, and evidence that a conversion altered the tunnel or wiring. A later overdrive can improve touring but should be judged as an engineered system.
Listen to the differential during acceleration, steady load, and coast. Inspect its mounts, cover, seals, half-shafts, universal joints, trailing-arm region, and strut rods. Note clunks during throttle transitions and vibration that changes with road speed. Establish final-drive ratio rather than inferring it from engine speed when the tachometer or tire diameter may be wrong. Ratio strongly affects motorway comfort, speedometer calibration, and the usefulness of a performance engine.
Steering, suspension, and wheel bearings shape trust
At the front, examine steering gear, coupler, power-assist components where equipped, hoses, control valve, linkage, ball joints, bushings, springs, shocks, wheel bearings, and mounting areas. Leaks, dead steering-wheel movement, binding, and tire contact require diagnosis. At the rear, inspect trailing arms, bearings, transverse spring, half-shafts, strut rods, differential supports, shocks, and alignment shims. Rear bearing or trailing-arm work can be specialized and should be included in estimates.
During the road test, note center feel, return after turns, response to road crown, behavior over bumps, and stability under gentle acceleration and braking. A vintage wide-tire car can follow road grooves, but abrupt direction changes or persistent wander are not character to celebrate. Evaluate tire age and pressure before blaming geometry. A professional alignment is meaningful only after worn joints, bearings, mounts, and mismatched tires are corrected.
Brake design and service history are safety gates
Inspect master cylinder, booster, hard lines, flexible hoses, distribution or warning components, parking brake, calipers, rotors, and leakage at every wheel. Corvettes of this era can develop brake concerns after storage even when friction material has little wear. Ask when fluid was changed, calipers serviced, hoses replaced, and wheel bearings checked. A statement that the car “stops fine” is not a service record.
Start the drive with a low-speed controlled stop. Pedal travel should remain consistent, and the car should not pull, grind, drag, or require pumping. Recheck for heat differences and fresh fluid afterward without touching hot components. Stainless-sleeved calipers, different master cylinders, or other updates may be sensible, but confirm compatibility and workmanship. If braking is uncertain, stop the test and arrange transport; future restoration plans do not make the present car safe.
Date every tire and inspect every wheel
A C3 can cover few miles while its tires become dangerously old. Record date codes, sizes, load and speed descriptions, construction, and condition, including the spare. Look for sidewall cracking, hardened tread, separation, flat spots, mismatched models, and rubbing. Verify that the tire is suitable for the wheel width and that the combination clears brakes, frame, body, and hoses through steering and suspension travel.
Inspect wheels for cracks, bends, corrosion at sealing surfaces, damaged lug seats, incorrect nuts, and elongated holes. Model-specific aluminum or special-edition wheels can have restoration and authenticity issues of their own. Decorative condition should not obscure structural assessment. Replace questionable tires before using a high-speed test to judge ride or balance, then torque wheels by the correct procedure and recheck as recommended.
Use the cabin to check water, heat, and unfinished work
Operate windows, locks, latches, gauges, warning lamps, horn, exterior lights, wipers, heater, ventilation, air conditioning if equipped, radio, power accessories, rear defogging where applicable, and interior lighting. Inspect the fuse area and accessible harness for heat damage, brittle insulation, unsupported splices, and unlabeled additions. Gauges should be compared with independent readings when their accuracy affects the mechanical conclusion.
Remove roof panels with the owner’s agreement and inspect latches, seals, storage hardware, cracks, and fit. Check carpets and storage bins for dampness, mildew, corroded fasteners, and evidence of leaks from glass, roof openings, doors, cowl, heater case, or rear window. Inspect seat frames, tracks, belts, steering-column movement, pedals, and parking brake. New upholstery can coexist with old electrical and moisture problems beneath it.
Plan a road test that reaches operating temperature
Confirm insurance and choose a route with low-speed turns, ordinary acceleration, steady cruising, moderate bumps, and safe braking. Let the seller demonstrate any unfamiliar controls. Record cold and hot starting, idle, throttle transition, shifts, clutch action, steering, braking, temperature, oil pressure, charging, fumes, vibration, rattles, and cabin heat. Avoid aggressive driving; it introduces risk while revealing less than a careful lift inspection and measured tests.
After shutdown, place the car over clean ground and look again for oil, coolant, fuel, transmission fluid, differential lubricant, and brake fluid. Observe hot restart and vacuum-system behavior after the engine stops. Sort results into immediate safety work, near-term reliability work, legal or configuration issues, and optional appearance work. Obtain parts-and-labor estimates from shops familiar with the generation, especially for birdcage, trailing-arm, body, and vacuum-system tasks.
Make records prove continuity, not volume
A persuasive file includes old titles or registrations where lawful, dated photographs, ownership correspondence, service logs, restoration images, engine and transmission invoices, machine-shop details, alignment results, and receipts tied to the car. Check that dates, mileage, colors, components, and recognizable damage form a continuous story. A thick binder of catalog receipts cannot prove installation quality. An appraisal or judging award describes a past opinion under stated conditions, not current mechanical health.
Compare the seller’s major claims with written evidence and ask permission to copy relevant records while protecting personal information. If provenance, original powertrain, rare options, or special-edition status materially affects the price, commission an independent marque expert. Authentication after purchase is a poor substitute for diligence before a binding agreement. Put included documents, loose components, roof bags, spare parts, keys, and tools into the bill of sale.
Buy the complete story, not one dramatic feature
Finish by checking correspondence: identity with title, physical features with model year, installed systems with seller description, restoration claims with photographs, condition with price, and configuration with intended use. Structural soundness, safe brakes and tires, predictable steering, fuel integrity, and cooling come before paint and option prestige. Estimate deferred work honestly and retain contingency for what regular driving reveals.
A good C3 does not have to be original, powerful, or flawless. It must be understandable and represented accurately. Walk away when access is restricted, structural concerns remain unexplained, identity evidence conflicts, or pressure replaces documentation. Fifteen years of variation give buyers many alternatives. Patience makes it possible to select the era, condition, and compromise that deliver the Corvette experience you actually want.